Bodybuilding is a sport in which the goal is to increase muscle size and definition. Bodybuilding increases the endurance of muscles, as well as strength, though not as much as if it were the primary goal. Bodybuilders compete in bodybuilding competitions, and use specific principles and methods of strength training to maximize muscular size and develop extremely low levels of body fat. One of the benefits of competing is improved progress. Bodybuilders who compete make better progress then those who do not. One reason is that regular competition forces you to cycle your training. Thus the body is constantly receiving new training stimulus and responds with new muscle growth. Another reason that competitive bodybuilders make better progress is because they tend to make a great effort to learn as much as possible about the sport.
The Symmetry Round
This round is where you will make your first impression on the judges. You’ll be asked to stand facing the judges with your hands at your sides. Even though this is called “standing relaxed” Do Not relax! You must keep your muscles tensed and under control at all times while you are on stage. The judges may be looking at you at any time so you need to be ready. You don’t realize how hard posing is until you have done it. And I don’t mean hit a 5 second pose.
The Compulsory Round
This is where you really get to show the judges your development. This round consists of 7 compulsory poses; each designed to show the judges different aspects of your physique. You must have these 7 poses down pat before you step on stage.
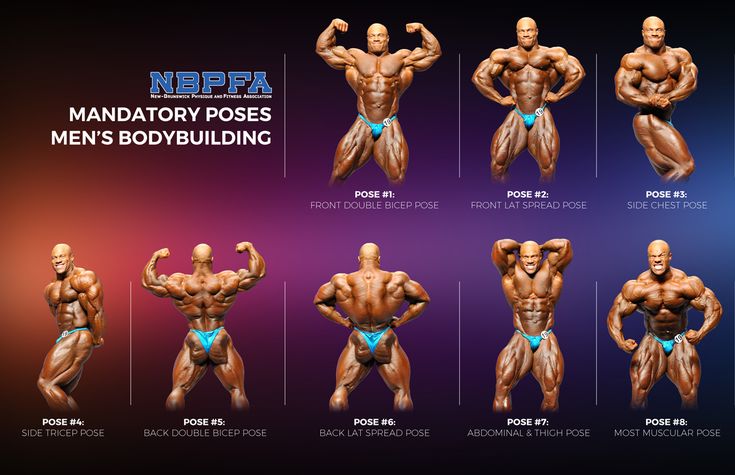
The 7 compulsory poses are:
- Front double biceps
- Front lat spread*
- Side chest
- Side triceps
- Back double biceps
- Back lat spread*
- Abdominals and thighs
*women do NOT have to do the front and back lat spread.
During the compulsory round you are compared with your competitors. The judges usually call out 2-3 competitors and have them run through the seven compulsory poses together. Then the judges will call out another 2-3 competitors and have them run through the compulsory poses. They will continue this procedure until they have all of the competitors ranked from first to last.
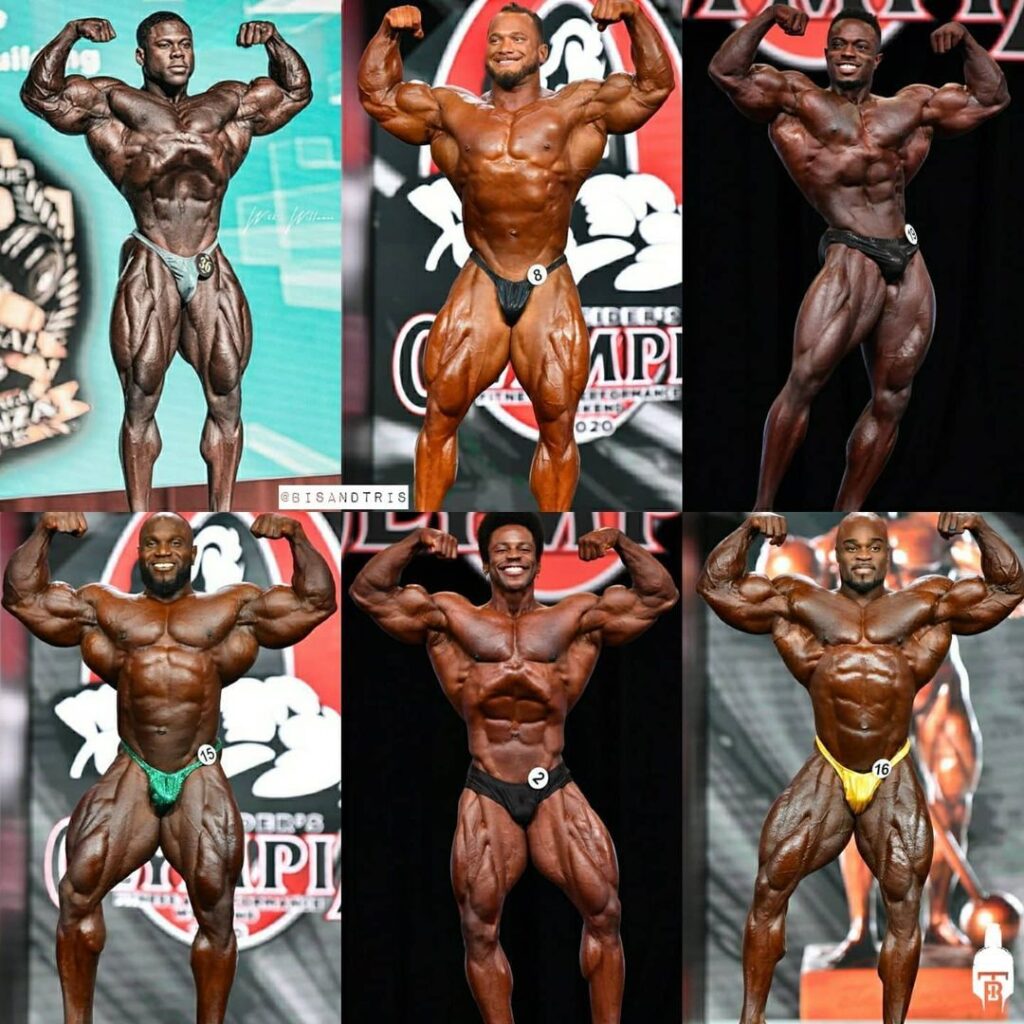
Front Double Biceps
There are two ways to do this pose, with a stomach vacuum or with your abs flexed and crunched. The vacuum method allows for a broader shoulders base and lat spread, while the abdominal crunch method is impressive if your midsection is ripped. Practice both ways and do the variation which you feel makes you look the best overall. You should hold your arms in such a fashion as to give each arm an equally balanced look. If you’re biceps are less than perfect, try holding your forearms at almost right angles with your elbows and fully twist your wrists to bring out the biceps peak. It is usually more impressive when the upper arms are slightly above parallel with the floor. Make sure to bend your knees slightly and tense your legs while doing this pose.
Front Lat Spread
To get a full lat spread, you must learn not to shrug your shoulders, but to hold them down. This will make your lats look fuller and make you look bigger. While pushing your fists against your sides, attempt to pull your shoulder blades apart and spread your lats outward. To make this look good, you will have to have great scapula flexibility. After practice and some stretching you should be able to perform this move precisely, spreading your lats to their full potential. As with the front double biceps you can do this pose with a stomach vacuum or with your abs flexed and crunched. The vacuum method allows for a broader shoulders base and lat spread, while the abdominal crunch method is impressive if your midsection is ripped. Practice both ways and do the variation which you feel makes you look the best overall. Make sure to bend your knees slightly and tense your legs while doing this pose.

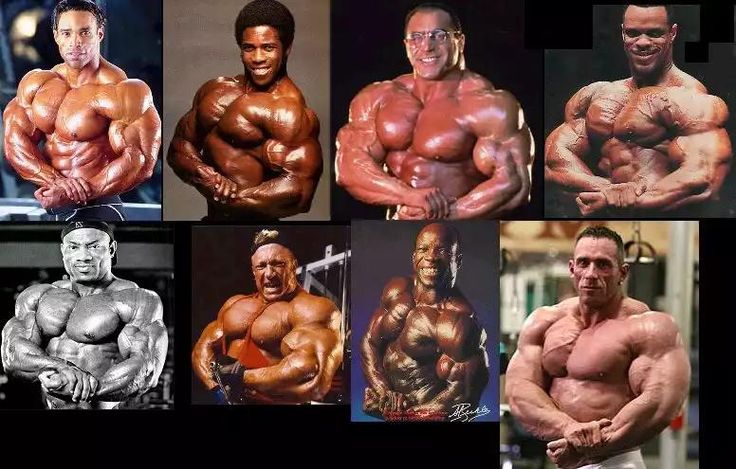
Side Chest
With this pose there are a couple of different leg positions that you can use. Choose the position that makes you look the best. One position requires your back leg (away from the judges) to be held relatively straight and bent only a few degrees at most. While your front leg will be bent with your toes pointed and calves flexed. The other position is as if you’d been frozen halfway through a forward step. Your back leg is slightly bent and behind the torso. Your front leg is slightly bent and in front of the torso. Make sure to tense your leg muscles. No matter which leg stance you choose, the upper body portion of this pose will be the same. The only difference would be which side of the upper body is used. For the left side, simple reverse these instructions. Expand your rib cage and chest. Bend your right arm at 90 degrees with your palm facing up making a fist. Keeping your right arm pressed against your side (especially your upper arm) will give that arm an even more massive appearance. Meanwhile, your left arm should extend across your abdomen grasping the wrist of your right arm with your palm facing down and pushing against your body. Flex everything in this position.
Side Triceps
As with the side chest, there are a couple of different leg positions that you can use for this pose. Choose the position that makes you look the best. One position requires your back leg (away from the judges) to be held relatively straight and bent only a few degrees at most. While your front leg will be bent with your toes pointed and calves flexed. The other position is as if you’d been frozen halfway through a forward step. Your back leg is slightly bent and behind the torso. Your front leg is slightly bent and in front of the torso. Make sure to tense your leg muscles. No matter which leg stance you choose, the upper body portion of this pose will be the same. The only difference would be which side of the upper body is used. For the left side, simple reverse these instructions. Extend your right arm down your side, reach behind your back with your left arm and grasp your right wrist. Keep your left palm toward the rear. With your arms anchored in this position, you will be able to pull your muscles to bring out the bulk and definition of your triceps, shoulder, and chest. Experiment keeping your right arm perfectly straight and rotating it in different directions to bring out different striations on your delts and triceps. Keep your right triceps pressed firmly against your side to flatten and widen the muscle, making it look larger. You should keep your stomach tight and expand your chest. Remember to keep all of your body flexed.
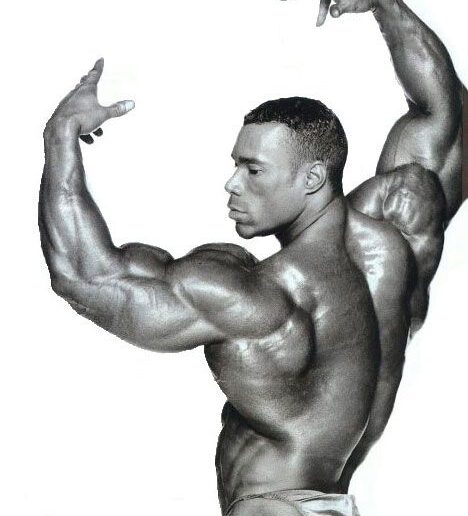
Back Double Biceps
The back double biceps pose is similar to the front double biceps pose except for a few important differences. Your calves and hamstrings have to be flexed. It will not look good if you get the top half of your body right and the bottom half is relaxed. Your arms should be pulled back toward the judges as well as your wrists. Your elbows should be more frontward (away from the judges) than your hands. With your spine rounded, your shoulder blades should be spread and your back muscles should be flexed. To really bring out the lower back, tense your abs. You can turn your head from side to side to show the muscles of your trapezius. Remember to keep all of your body flexed.

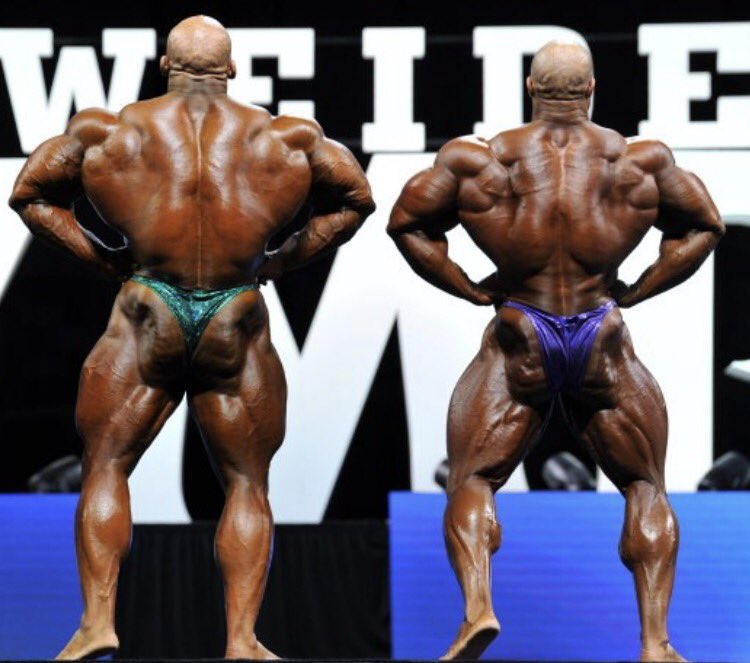
Back Lat Spread
The back lats spread is similar to the front lats spread. The only difference is that you round out your torso, so that it’s forward, while pulling your elbows ahead of the midline of your torso. An effective way to start this pose is with your lats originally crunched together. When you pull them apart to expose your entire lat spread, it is a more dramatic way of going into the pose. Your calves and hamstrings have to be flexed. It will not look good if you get the top half of your body right and the bottom half is relaxed. Remember to keep all of your body flexed.
Abdominals and Thigh
Put your strong leg about one foot in front of the other. The toes of your back foot should angle outward, while your front foot’s toes point forward. With your front leg tensed, flex your quads and calves to bring out your muscle definition. Different bends and angles will bring out various muscles better. You can switch angles mid-way through the pose if you like. With an interlocking grip, place your hands behind your neck and angle your arms upward. Flex your biceps and chest, while strongly tensing your abdominal region. This will make you look quite impressive. Keep flexing it all thoroughly and be sure to stand as straight as possible. Remember to keep all of your body flexed.

The Free Posing Round
In a close contest the free posing routine can be the difference between winning and losing. With a good posing routine you can win the audiences approval and they will start screaming your name or number, and in a close contest the judges often vote based on the audiences response. The first step to creating a great posing routine is picking the music. You must choose music that suits your physique. Some of the larger heavyweights like to use powerful classical music, but most likely that wouldn’t suit a lightweight or middleweight. Some people like to use upbeat dance type music. This is good for posing to and it can really get the audience involved. Another type of music that is often used is heavy metal. You need a powerful physique to match with the powerful music. If you have trouble picking what type of music to use in your routine, you should listen to a wide variety of music and picture yourself posing to the various songs on the radio. Eventually a song will catch your attention and then you can build your routine around it. At the amateur level posing routines are usually 90 seconds in length. Get your music copied onto a CD by itself with no other music on the CD. Write your name and competitor number on the CD with a permanent marker. You’ll usually pass your music into the contest officials at the weigh in. Also make a note on your CD to let the music man know if you would like to have your music start before you step on stage or when you are centre stage. Make a backup copy of your music and keep it with you backstage. If anything happens to your original CD, you’ll always have a backup.
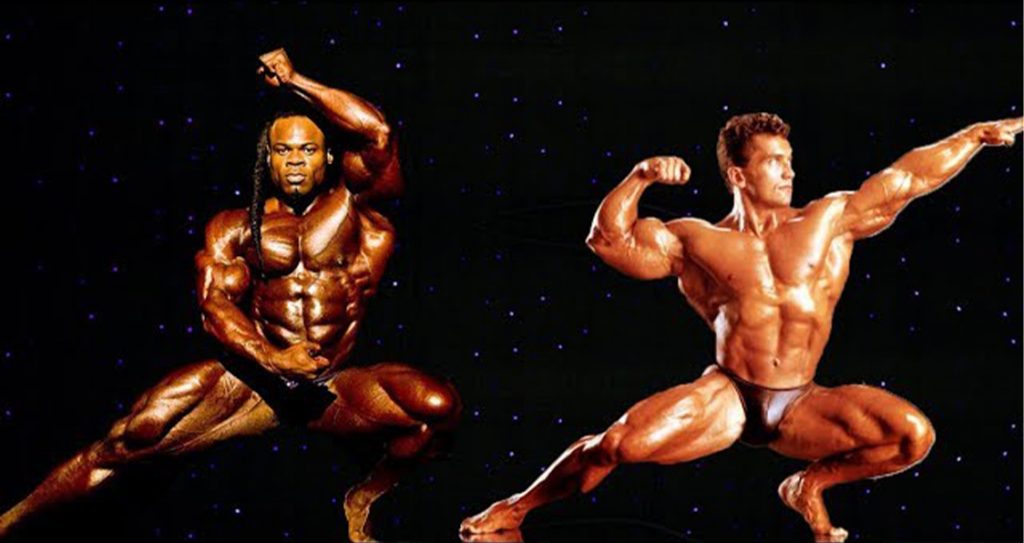
Which Poses?
You should watch as many bodybuilding shows as possible. Record contests that come on T.V. or order contest videos and watch them over and over again. This will help you to visualize your own routine. If you can, try and get help from an experienced competitor. Be creative and design a routine to highlight your strengths and hide your weaknesses. The purpose of a posing routine is to show your physiques strong points, hide your weak points, and entertain the audience and judges. Emphasize your strong points early in your routine to get a good first impression. Organize your poses so that you can move smoothly from one pose to the next. Generally you start with a few front poses, move to a couple side poses, and then move to a couple back poses, etc. Practice your routine over and over until you can do it in your sleep. Start practicing your routine at least 6 weeks before the contest. Make sure to pace yourself. Often you see novice bodybuilders rush their routines and get ahead of their music. Take your time when onstage. Hit a pose, hold it for a couple of seconds, and then smoothly move into another pose. It is a good idea to bring a headset and an extra CD of your music with you to the bodybuilding contest. Find a place backstage by yourself where you can rehearse your routine so it is fresh in your mind before you have to go out an perform in front of the judges and audience. Always appear confident onstage. Smile as much as possible and make eye contact with the judges and audience. Keep your head up, maintain perfect posture at all times, including walking on and off the stage. Keep your muscles tensed at all times while onstage. There will be plenty of time to relax after the show, during the contest give it your best.

The Posedown
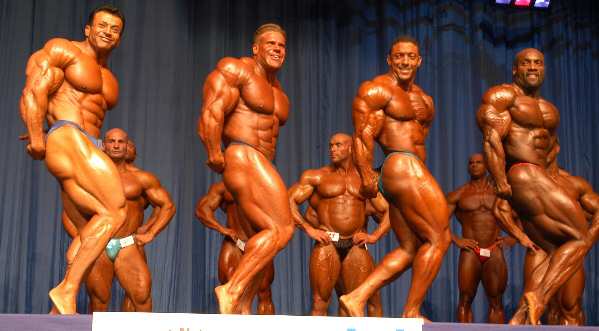
Unlike the first 3 rounds where your poses are arranged and your routine is rehearsed. The posedown is made up on the spot. The posedown usually involves 3-5of the top competitors. You will all line up onstage and then the judges will tell you to pose down and hit your best poses. It is difficult to prepare for a posedown but there are some strategies to help give you the edge. For example, if your opponent has strong arms and your arms a weak do not compare arm poses together. When you opponent hits an arm pose you should do another pose such as abs and thighs, etc. The idea is to offset their strong points with your strong points. However, if your opponent does a side chest pose and you have a strong side chest pose stand there and accept the challenge. Similar to the free posing routine you want to emphasize your strong points and hide your weak points.

Dr Saranjeet Singh
Fitness & Sports Medicine Specialist
Lucknow (UP), INDIA

